
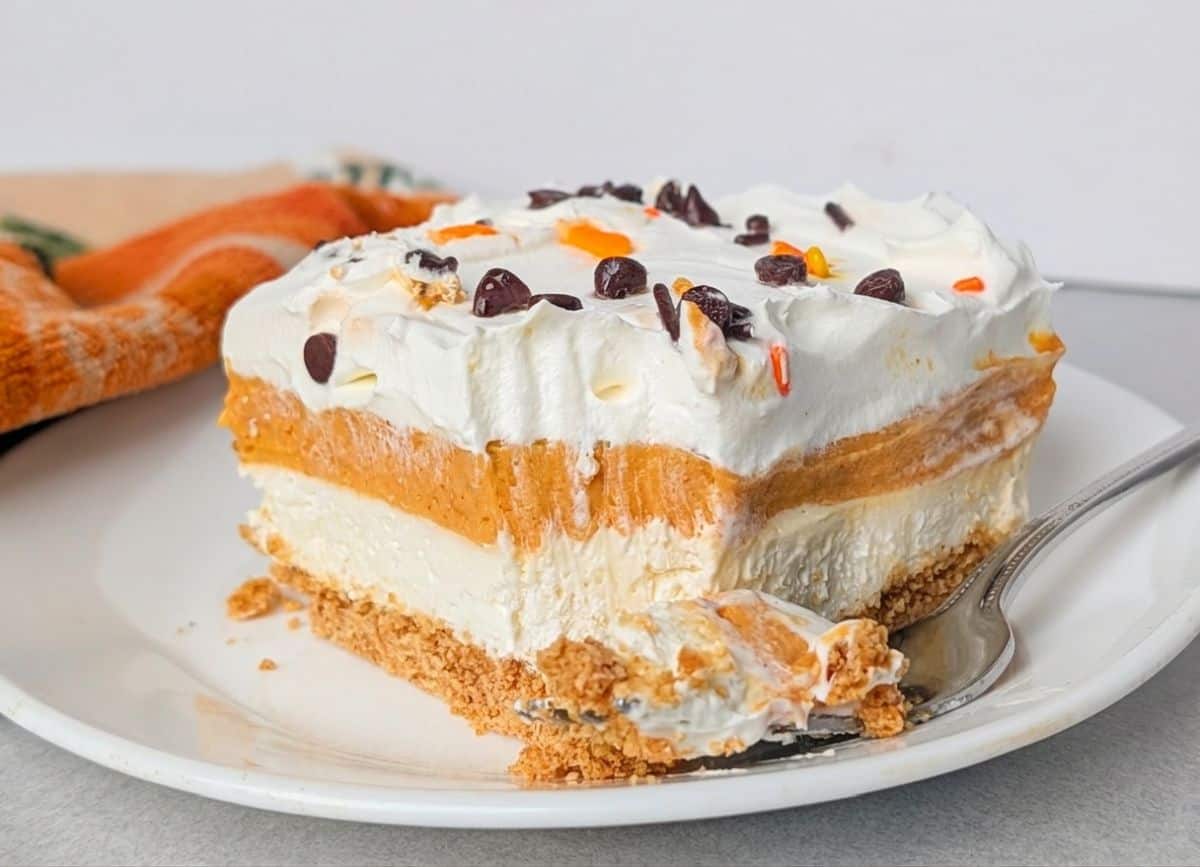
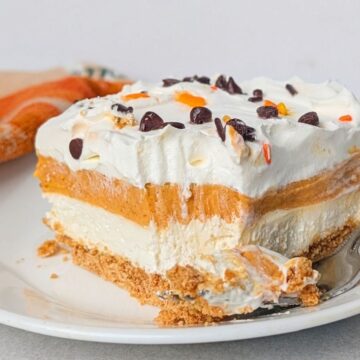
This easy no-bake pumpkin lush recipe is the ultimate Thanksgiving dessert that's guaranteed to impress. Layers of buttery graham cracker crust, rich cheesecake, and spiced pumpkin come together in one irresistible bite. Topped with a cloud of fluffy whipped topping, it tastes like your favorite pumpkin pie... only creamier and dreamier. This four-layer beauty is destined to become your new Thanksgiving tradition!
Jump to:
- 😍Why This Pumpkin Lush Recipe Is a Fall Favorite
- 🎃Layers That Make This Pumpkin Lush Dessert Stand Out
- 🦃A Go-To Dessert for Thanksgiving, Christmas, and Beyond
- 🥘Just Simple Ingredients Needed
- 🔪How To Make This Pumpkin Lush Recipe
- 🌿Healthy Ingredient Substitutions
- 📖Easy Pumpkin Lush Recipe Variations
- 🍽Essential Equipment Needed
- 🍶Storing Your Pumpkin Lush Dessert
- ✅Betty's Top Tip For The Perfect Slices
- ❓Pumpkin Lush Recipe FAQ
- 🎃More Pumpkin Desserts
- 🦃More Thanksgiving Recipes
- 📋Recipe With Step-By-Step Instructions
- 💬 Comments
😍Why This Pumpkin Lush Recipe Is a Fall Favorite
Once you try this pumpkin lush recipe, it's likely to earn a permanent spot in your fall dessert rotation. Unlike a traditional baked pie, there's zero oven time involved, which frees up valuable space when you're juggling a full holiday menu. As with our creamy Pumpkin Dip, it also holds up beautifully in the fridge, making it one of the easiest desserts to prep ahead of a busy day.
🎃Layers That Make This Pumpkin Lush Dessert Stand Out
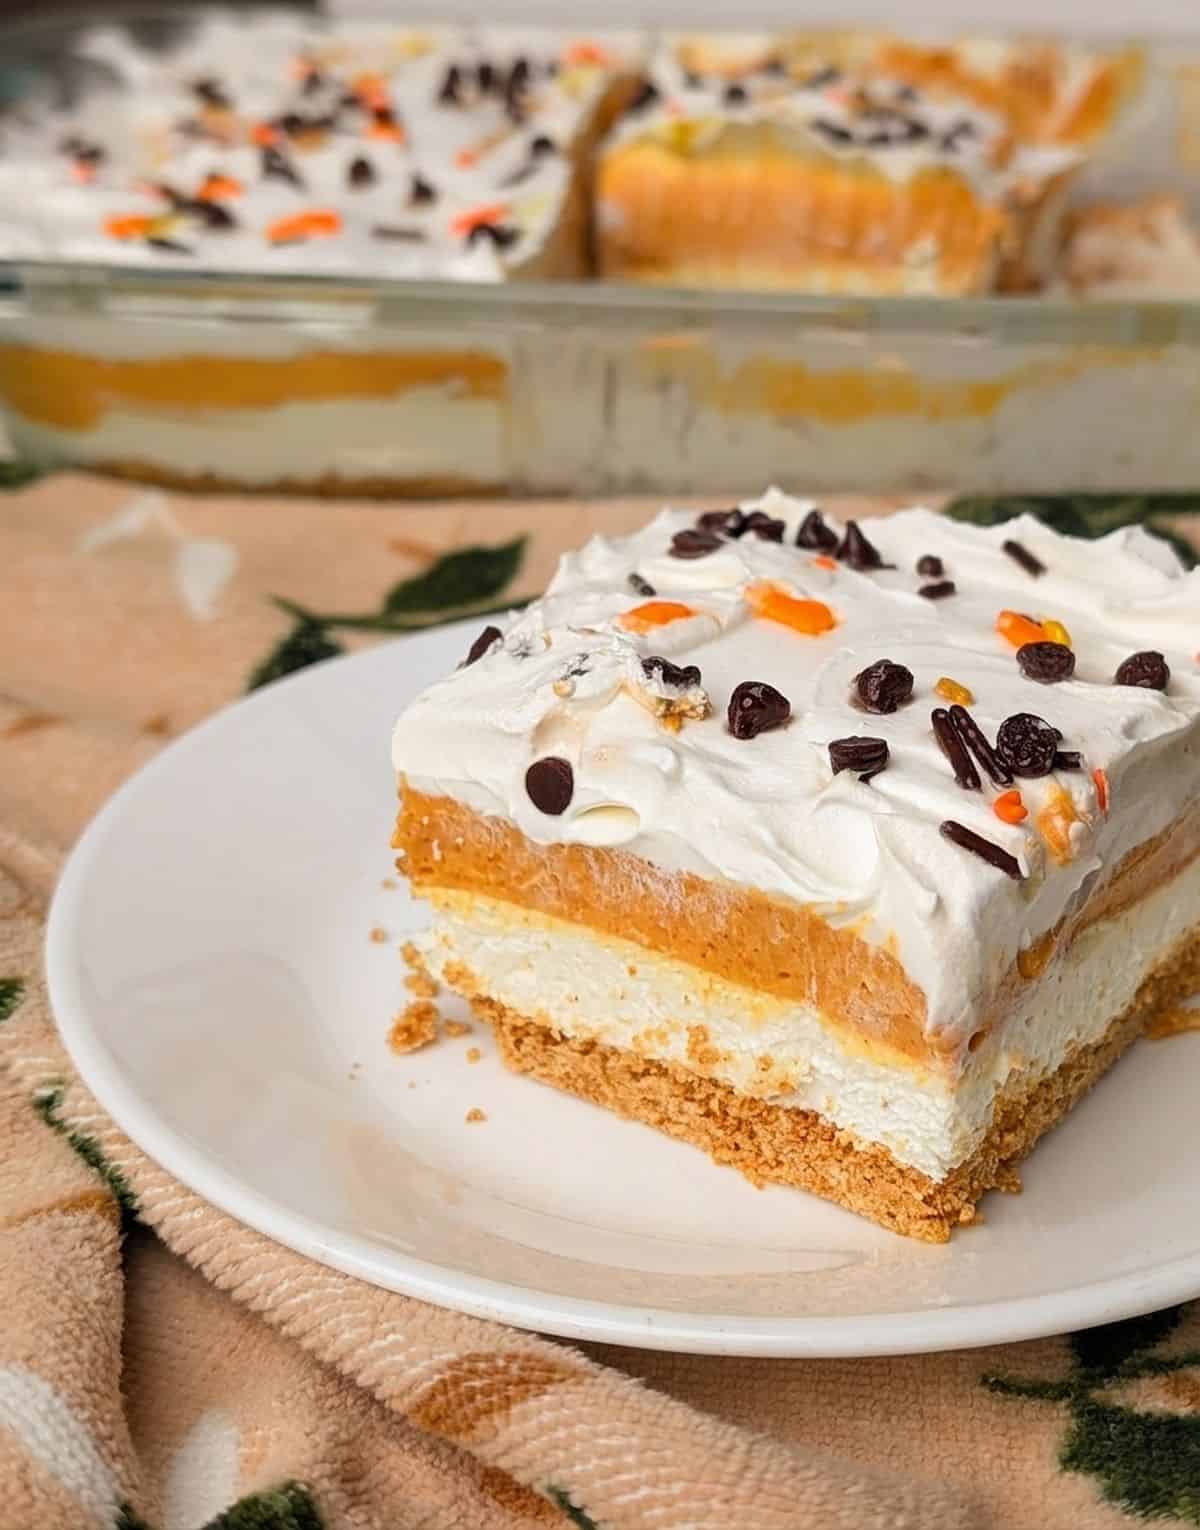
What sets this pumpkin lush dessert apart -- a spin-off or our Oreo Lush -- is the balance of textures in every forkful. The cream cheese layer brings a tangy richness, while the pumpkin layer (which includes vanilla pudding, evaporated milk, and plenty of warm spices) delivers all the cozy flavors of the season. A cloud of Cool Whip tops things off, and since it's folded into nearly every layer, this pumpkin lush pie recipe stays soft, light, and never dense.
🦃A Go-To Dessert for Thanksgiving, Christmas, and Beyond
This layered pumpkin dessert isn't just for Thanksgiving; it earns its keep all season long, from casual fall get-togethers to Christmas dinners. Just like our Peanut Butter Cheesecake Bars, It's easy to slice into neat squares, so serving a crowd at holiday parties takes zero extra effort.
🥘Just Simple Ingredients Needed
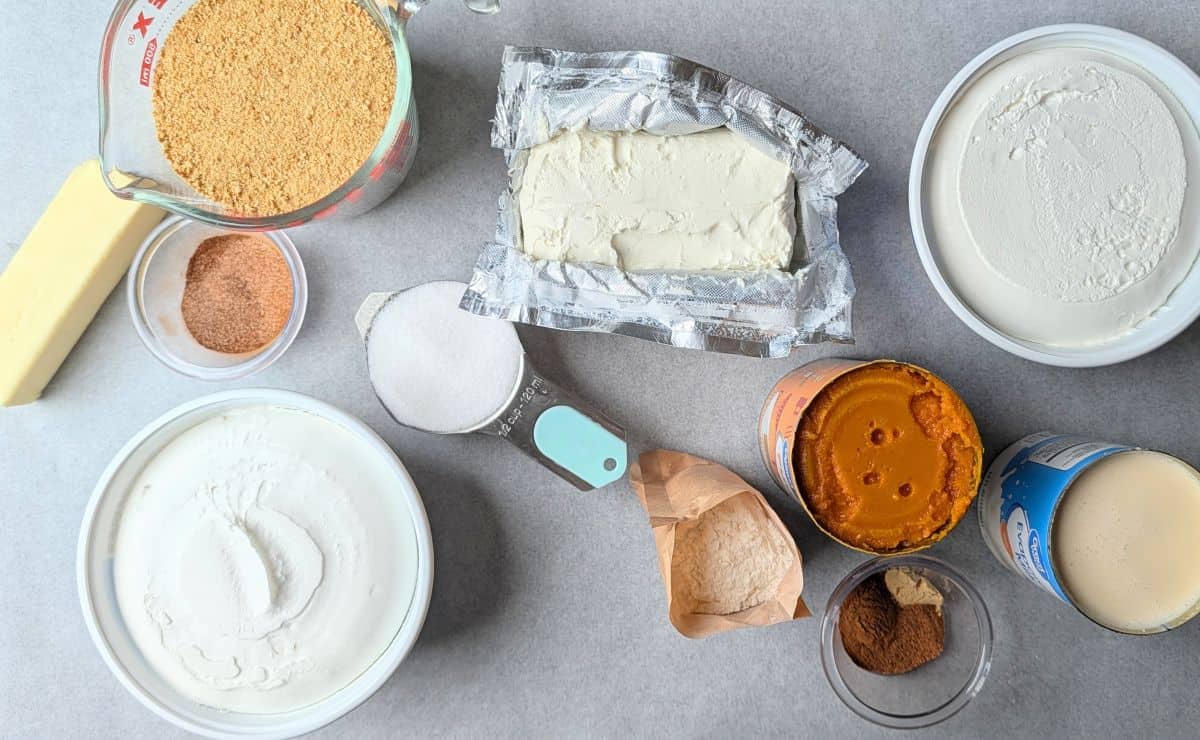
- Crust: Graham cracker crumbs, sugar, cinnamon, and butter combine to create a simple, no-bake crust with just the right amount of sweetness and spice. Pressing it firmly into the pan helps it hold together once sliced.
- Cream Cheese Layer: Cream cheese, sugar, whipped topping, and vanilla extract whip together into a light, tangy layer that tastes like classic cheesecake. This layer adds richness and helps balance the sweetness of the pumpkin layer above it.
- Pumpkin Layer: Pumpkin, cinnamon, nutmeg, evaporated milk, vanilla instant pudding mix, and more whipped topping come together for a creamy, spiced layer that sets without any baking. The instant pudding mix is the key ingredient here-- it helps the layer thicken and hold its shape once chilled.
- Top Layer: A final layer of whipped topping finishes the dessert with a light, fluffy crown that ties all three layers together. It also makes for a beautiful presentation, especially with a sprinkle of extra cinnamon, mini chocolate chips, or toasted pecans on top.
See recipe card for quantities.
🔪How To Make This Pumpkin Lush Recipe
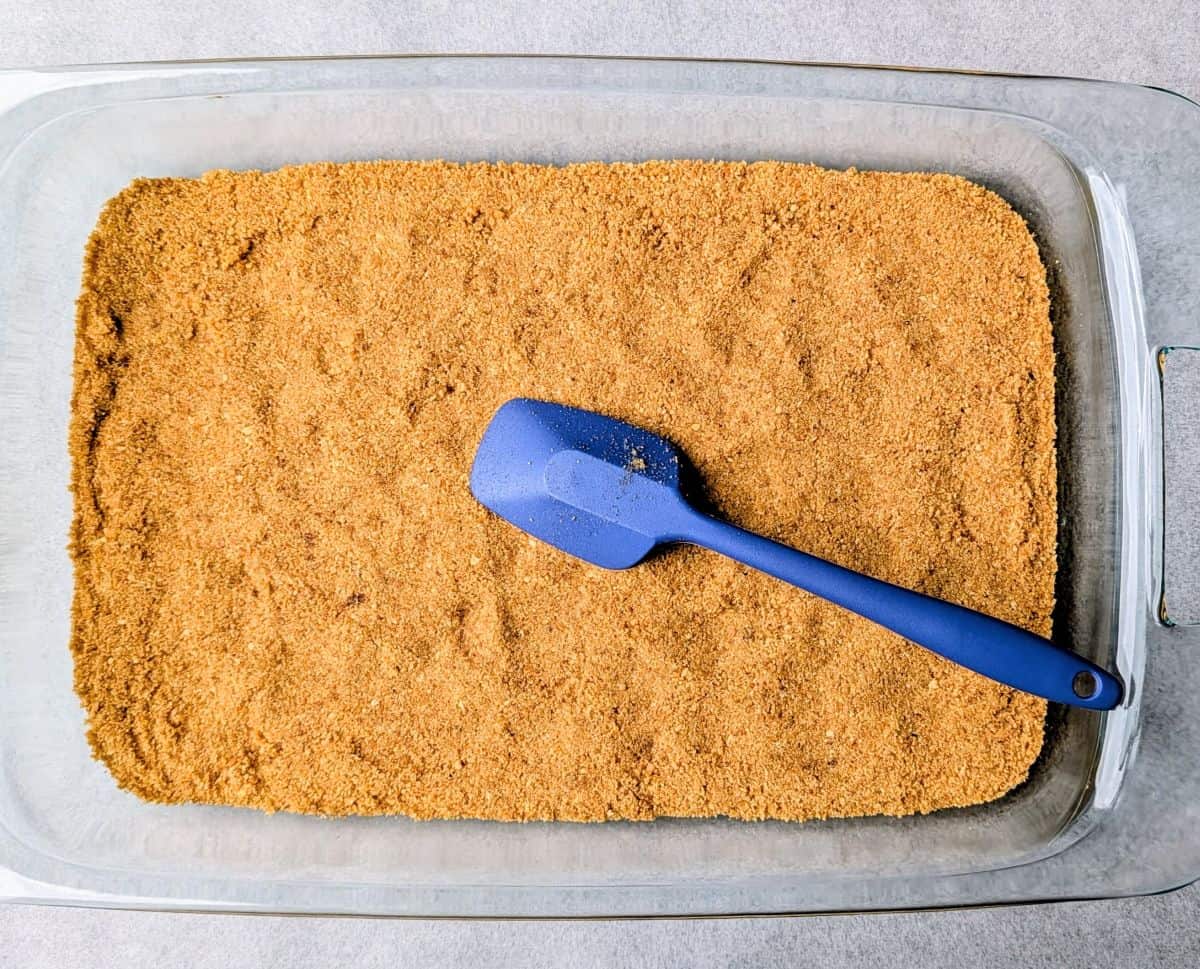
Step 1: Make the graham cracker crust and press firmly into bottom of baking dish.
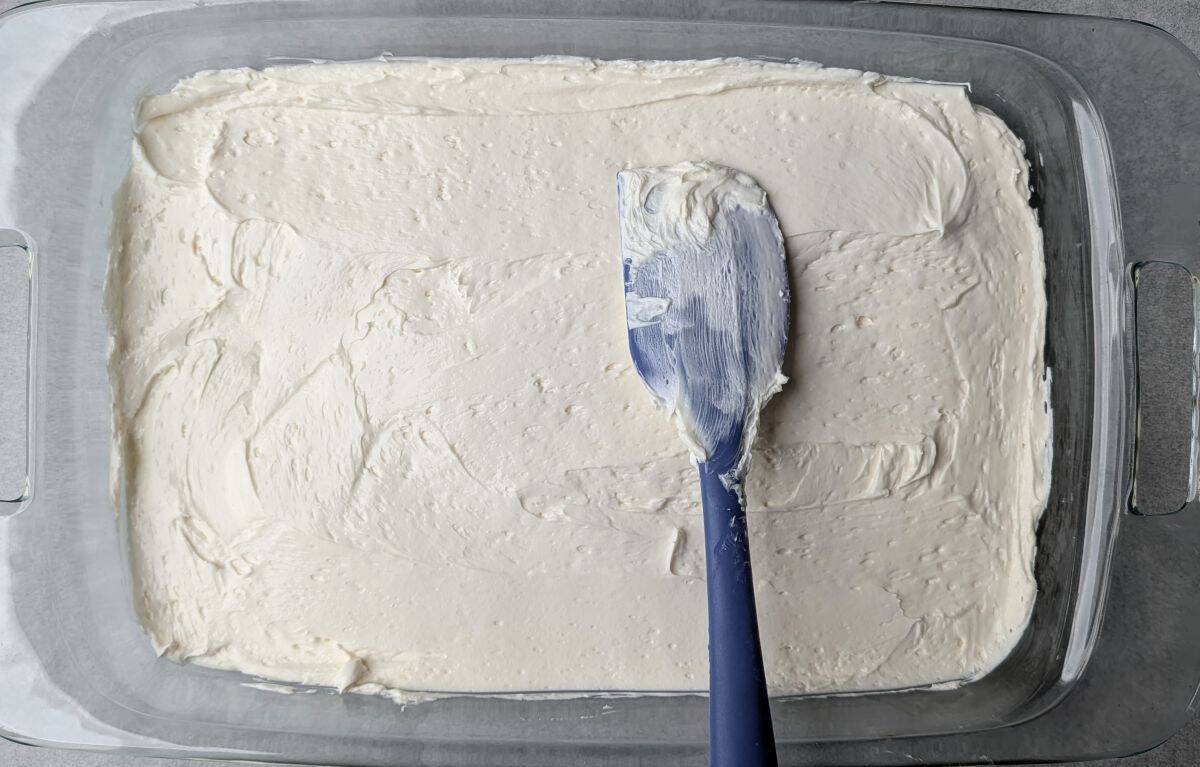
Step 2: Spread the cheesecake layer on top.
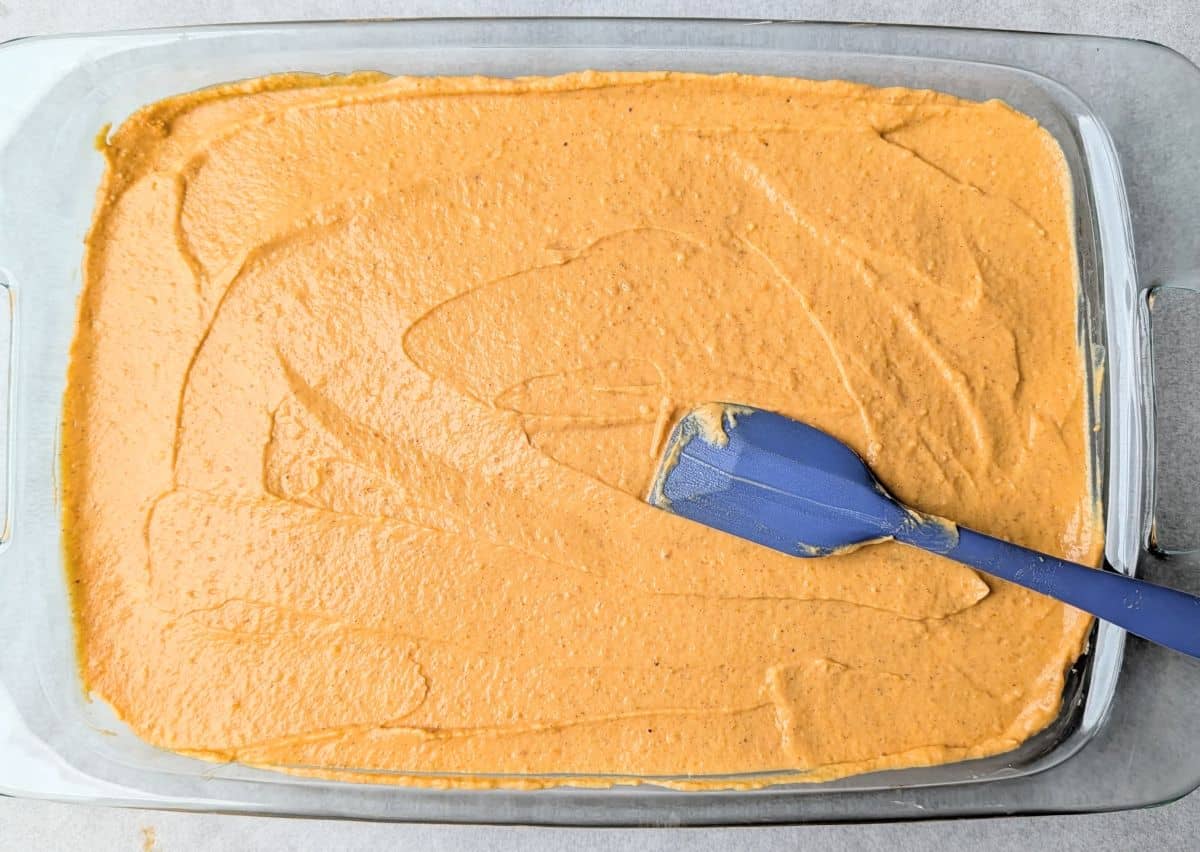
Step 3: Carefully spread the pumpkin layer on top of the cream cheese layer.
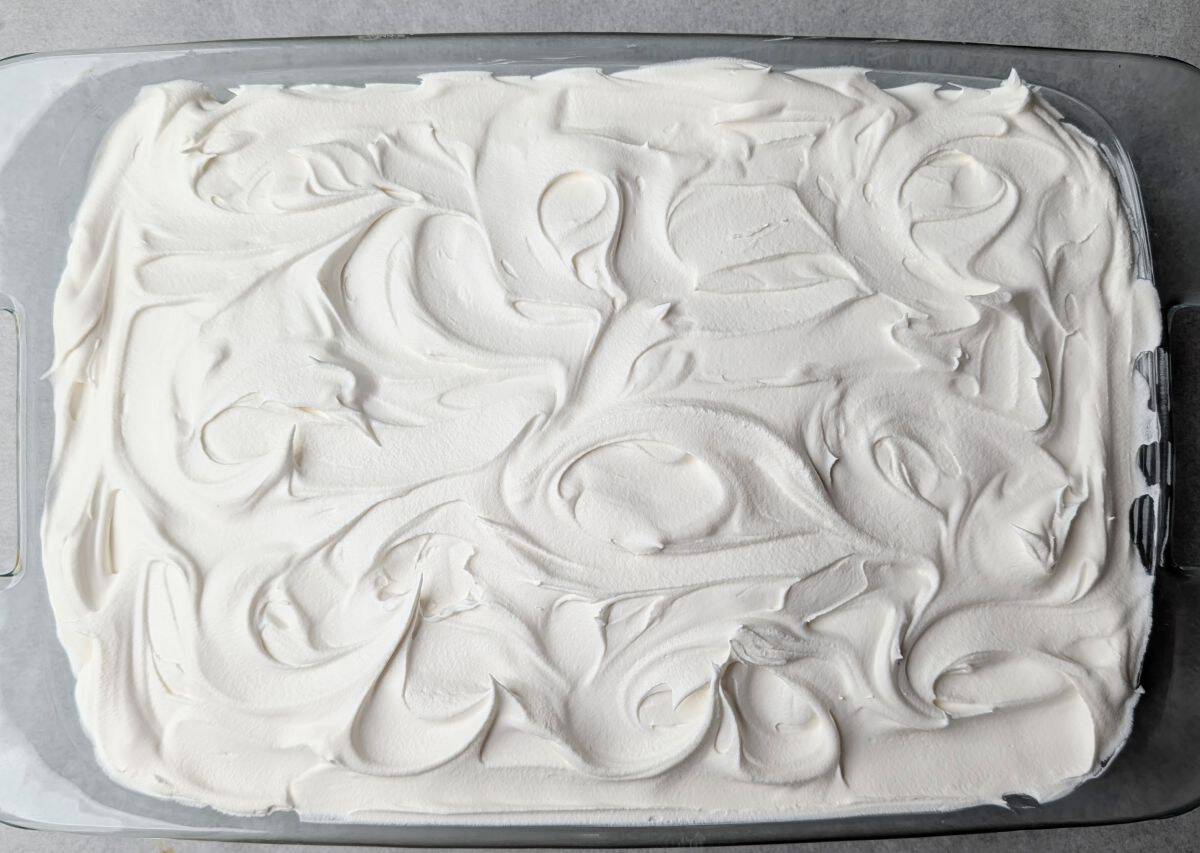
Step 4: Top with whip; chill to set.
For step-by-step instructions, see the printable recipe card below.
Hint: Spread each layer gently and evenly, working from the center outward, so the layers stay distinct instead of blending together. Using an offset spatula and applying light pressure will help you avoid dragging the pumpkin layer into the cream cheese layer below.
🌿Healthy Ingredient Substitutions
- Greek Yogurt for Whipped Topping: Swapping some of the whipped topping for plain Greek yogurt (as found in our no bake Strawberry Fluff) adds protein and a tangy flavor. It also cuts back on added sugar and fat.
- Light or Neufchâtel Cream Cheese: Using light cream cheese or Neufchâtel in place of full-fat cream cheese keeps the tangy, creamy texture with fewer calories and less saturated fat.
- Coconut Milk for Evaporated Milk: Full-fat canned coconut milk can replace evaporated milk for a dairy-free option that still delivers a rich, creamy consistency to the pumpkin layer.
📖Easy Pumpkin Lush Recipe Variations
- Mini Individual Cups: Instead of one large pan, layer the crust, cream cheese mixture, and pumpkin mixture into small cups or mason jars for a cute, single-serving dessert that's perfect for parties (just like our Halloween Dirt Cups!).
- Chocolate Crust Swap: Trade the graham cracker crust for crushed chocolate cookies or chocolate graham crackers. This adds a rich, chocolatey base that pairs beautifully with the spiced pumpkin layer.
- Pecan Crunch Topping: Sprinkle chopped toasted pecans or a light pecan praline crumble over the whipped topping for extra crunch and a nutty flavor that complements the warm spices.
See Easter Chocolate Lasagna for an easy, no bake springtime treat!
🍽Essential Equipment Needed
- 13x9 glass baking dish (so you can see the layers!)
- mixing bowls
- hand mixer
- silicone scraping and spreading spatulas
- offset spatula
🍶Storing Your Pumpkin Lush Dessert
This pumpkin lush pie recipe is the perfect make-ahead dessert. The rich layers actually taste better after chilling overnight!
Store for up to 5 days in the refrigerator (loosely covered with plastic wrap). Please note that the crust will start to get a little soggy after day 2.
You can also freeze this easy no bake dessert for up to 2 months. Freeze individual portions in freezer safe containers (not bags) and thaw on the counter before serving (the crust will be a little soggy).
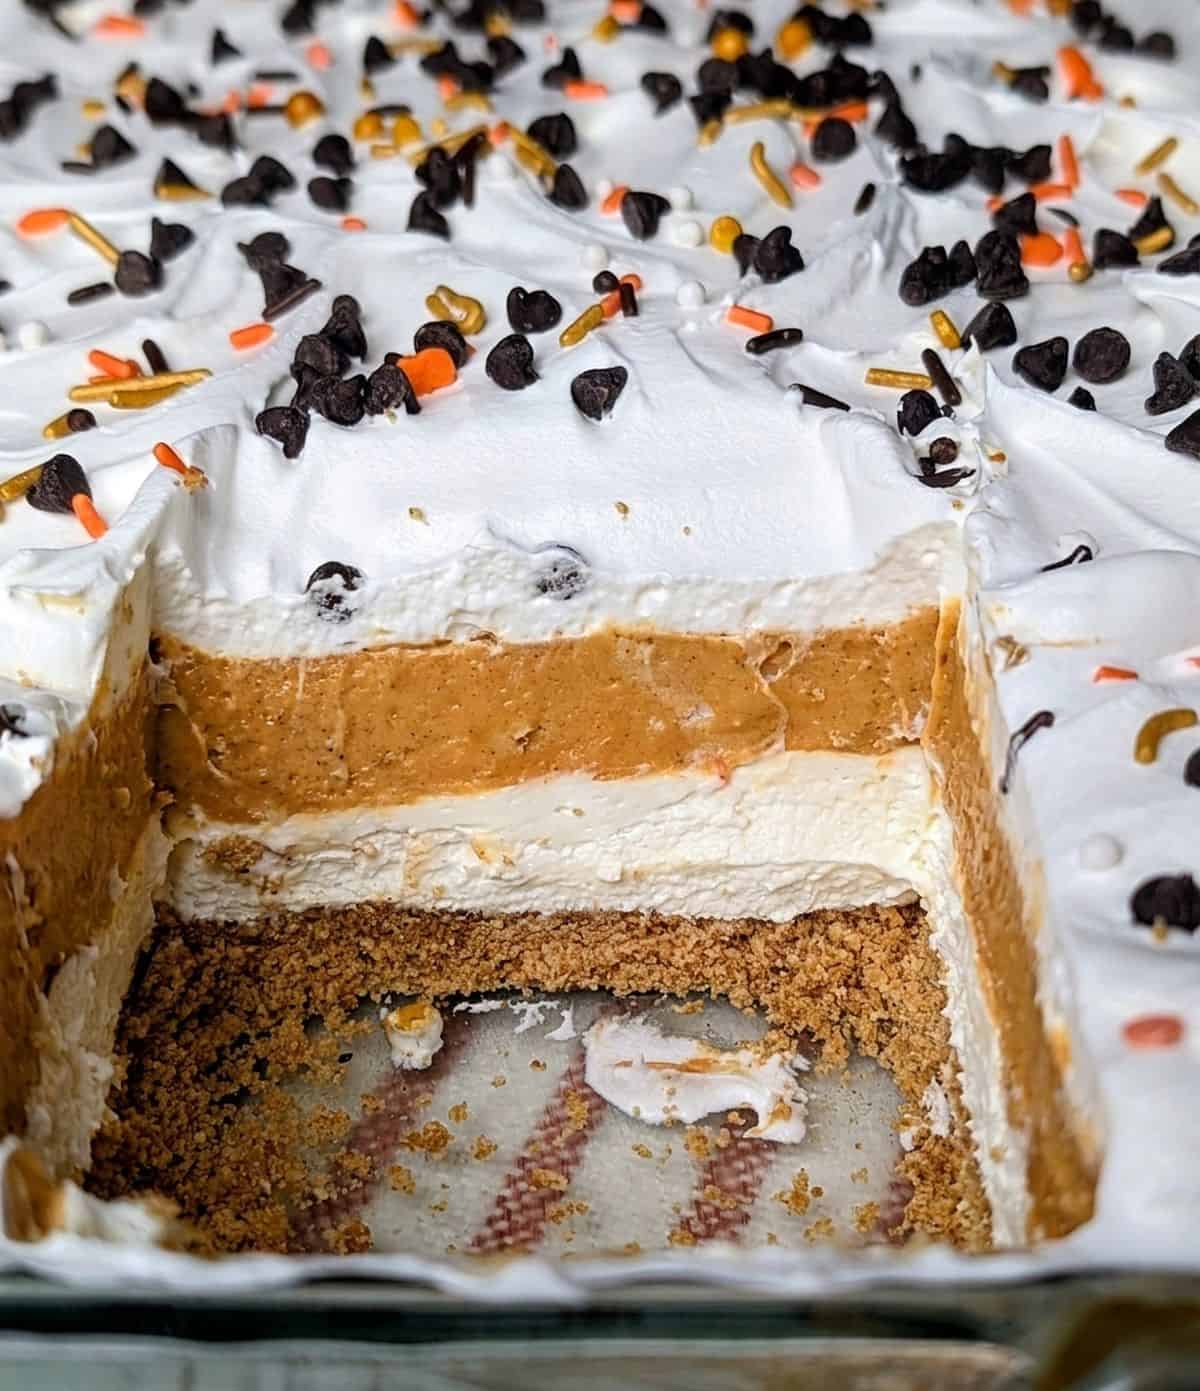
✅Betty's Top Tip For The Perfect Slices
The absolute best secret for slicing this layered pumpkin dessert perfectly is popping it into the freezer for about an hour before serving. Freezing firms up those rich cheesecake and pumpkin pie layers so they stay beautifully separated when you cut them. For the cleanest look, run a sharp knife under hot water and wipe it dry between every slice.
❓Pumpkin Lush Recipe FAQ
Yes! In fact, this no-bake layered dessert is perfect for making ahead. It needs several hours to chill and set, and the flavors actually meld together better when left in the fridge overnight.
No, you'll want to make sure you grab a can of 100% pure pumpkin puree for this recipe. Canned pumpkin pie filling already has sugar and spices added, which will make your lush dessert way too sweet and throw off the flavor balance.
If you want to switch things up, crushed gingersnap cookies, vanilla wafers, shortbread, or even Golden Oreos make fantastic alternatives for the crust. Gingersnaps in particular pair beautifully with the warm spices in the pumpkin layer (as found in our Pumpkin Trifle)!
Nope! This pumpkin lush recipe is a completely no-bake dessert. The melted butter acts as a binder when mixed with the graham cracker crumbs and sugar. Just press it firmly into your dish and it will firm up perfectly while chilling in the fridge.
🎃More Pumpkin Desserts
Looking for other cozy pumpkin dessert recipes like this pumpkin lush? Try these, or head over to our From-Scratch Desserts page:

🦃More Thanksgiving Recipes
These are my favorite dishes to serve with this pumpkin lush recipe at Thanksgiving:
📋Recipe With Step-By-Step Instructions
Pumpkin Lush Recipe
Equipment
- 13x9 glass baking dish (so you can see the layers!) Use a deep dish if you have one, but this can be made in a standard 13x9 as pictured.
- 3 mixing bowls (one for the crust, one for the cream cheese mixture, one for the pumpkin layer)
- scraping and spreading spatulas
- offset spatula (helpful for smoothing the layers)
As an Amazon Associate, I earn from qualifying purchases. I only recommend products I truly love and use in my own kitchen!
Ingredients
- 2 cups graham cracker crumbs about 30 graham crackers
- 1 tablespoon sugar
- 1 teaspoon cinnamon
- ½ cup (1 stick) butter melted
- 16 oz full fat cream cheese at room temperature; use bricks, not tubs
- ½ cup white granulated sugar
- 1 teaspoon vanilla extract
- 16 oz whipped topping (like Cool Whip) (2) 8 oz tubs, thawed (One full tub goes into the top layer, while the second tub is divided between the other two layers -- you'll have a small amount left over.)
- 5.1 oz vanilla instant pudding family size box
- 12 oz evaporated milk
- 15 oz 100% canned pumpkin do not use pumpkin pie filling
- 1 teaspoon cinnamon
- ½ teaspoon nutmeg
- ½ teaspoon ginger
- mini chocolate chips, sprinkles, toasted pecans optional toppings to add just before serving
Instructions
- In a medium mixing bowl, blend the graham cracker crumbs, 1 tablespoon sugar, and 1 teaspoon cinnamon. Pour in melted butter. Thoroughly mix to ensure that all crumbs have been saturated by the butter.
- Press mixture into the bottom of a 13x9 casserole dish. Use the back of a measuring cup or flat spatula to firmly pack and press the crust down. Refrigerate dish while you work on the next step.
- Use a hand mixer to combine the softened cream cheese, ½ cup sugar, and vanilla until smooth. Fold in 2 cups whip. Spread this mixture gently over the crust, smoothing it as much as possible. Return the dish to the refrigerator.
- In a large mixing bowl, whisk the pudding and evaporated milk until combined. Then add the pumpkin, cinnamon, nutmeg, and ginger; stir with a mixing spoon to incorporate. Fold in ½ cup whip until blended, then gently spread this mixture over the cream cheese layer.
- Top the pumpkin layer with an entire 8 oz tub of defrosted whip, spreading to edges.
- Loosely cover dish with plastic wrap. Refrigerate for a minimum of 4 hours so layers will set (but best overnight).
- Optional to decorate top layer with mini chocolate chips, festive sprinkles, and/or toasted pecans just before serving.
Notes
Nutrition
Please note that nutritional information is provided by a third party service and is intended for guidance purposes only. KitchenReadyBetty.com makes no claims to its accuracy.


Heidi says
The flavors of your pumpkin lush do not disappoint. Each bite serves up the most decadently sweet taste of autumn. I also like how quickly everything comes together. It feels like I am finished almost as soon as I start!
Kitchen Ready Betty says
Hi Heidi! I'm so thrilled you loved this easy no-bake pumpkin lush! It really is one of my favorite quick autumn desserts to throw together when I'm craving those sweet fall flavors without wanting to spend hours in the kitchen. Thanks so much for trying the recipe and leaving such a wonderful review!
David @ Spiced says
I've never had pumpkin lush before - to be honest, this is the first time hearing the term. But looking over the ingredients and recipe, I know I'm going to become fast friends with the lush! This sounds amazing, and I agree that it would make a great Thanksgiving dessert!
Kitchen Ready Betty says
Hi David! I'm so excited for you to try your first pumpkin lush! It truly is the perfect Thanksgiving dessert, especially since it's completely no-bake and frees up precious oven space on the big day. This easy no-bake pumpkin lush packs all those classic fall flavors into one simple dish. I can't wait for you to give it a try—I hope it becomes a new favorite!
Mike says
Hey Betty! I'm usually too stuffed to worry about dessert on Thanksgiving, but this looks like something that would force me to find some room! I love that your pumpkin lush recipe is no bake and that it can be made ahead of time, because we're busy enough preparing the turkey and sides. I really like your suggestion to prepare them in individual mason jars. Such a great idea and that makes them a great on-the-go dessert option.
Kitchen Ready Betty says
Hi Mike! Thanks so much for stopping by. I completely agree—oven space is always at a premium on Thanksgiving, which is exactly why this easy no-bake pumpkin lush is such a lifesaver! Prepping this make-ahead Thanksgiving dessert in individual mason jars is definitely one of my favorite tricks for easy serving and on-the-go snacking. I hope this no-bake pumpkin dessert becomes a new holiday favorite for you and your family. Let me know how it turns out!
Les Food Amour says
I love these traditional recipes, thank you for letting me discover this famous cake typical of your place, I suppose. Have a good evening
Kitchen Ready Betty says
I'm thrilled to be able to share this delicious dessert with you! This easy no-bake pumpkin lush is definitely a traditional favorite around here, especially when you want all those cozy fall flavors without having to turn on the oven. I hope you get a chance to try making this pumpkin lush recipe soon.
Barbara says
This sounds and looks delicious. I love the variations of ingredients that might be used as substitutes ,such as yougurt and diferent crusts.
Kitchen Ready Betty says
Hi Barbara! Thank you so much for the kind words! I completely agree, one of the best things about this Easy No-Bake Pumpkin Lush Recipe is how versatile it is. Swapping in yogurt or experimenting with different crusts—like a classic graham cracker, shortbread, or even a gingersnap crust—are fantastic variations to make this layered pumpkin dessert your own. I hope you get a chance to whip up this easy fall treat soon. Let me know which variation you decide to try!