This easy to make, 4-ingredient Zesty Ranch Cheese Ball will elevate your entertaining for any occasion! With cream cheese, sour cream, ranch seasoning and shredded Colby Jack cheese, this incredibly tasty appetizer is the perfect addition to any charcuterie board or serving tray.

This delicious ranch flavored cheese ball pairs so well with crackers, pretzels and raw veggies and is always the star of the hors d'oeuvre table.
It's also open to your personal touch and customization. You can add crushed nuts or bacon (or both) to the exterior for a salty, crispy crunch.

You can also form it into fun shapes for different occasions. Keep it in a ball form or check out our creative variations below, which the kids will enjoy making with you!
From Football Cheese Ball to Zesty Turkey Cheese Ball, there's a zesty cheese ball for everyone.
Jump to:
🥘Ingredients

- Cream cheese, softened--Philadelphia brand--I recommend full fat for easier shaping
- Sour cream--Daisy's or Breakstone's are creamy and have a nice tang--even when you use reduced fat
- Dry ranch seasoning mix--you may use one envelope/sleeve OR measure from a shaker tub to choose your zest level (I like Hidden Valley Ranch for both of these options)
- Shredded Colby Jack cheese --I typically use Kraft's 2%; Monterey Jack cheese is a good alternative
Optional extras to cover the cheese ball could include: crumbled bacon, bacon bits, slivered almonds or crushed walnuts
See recipe card for quantities.
🔪Instructions
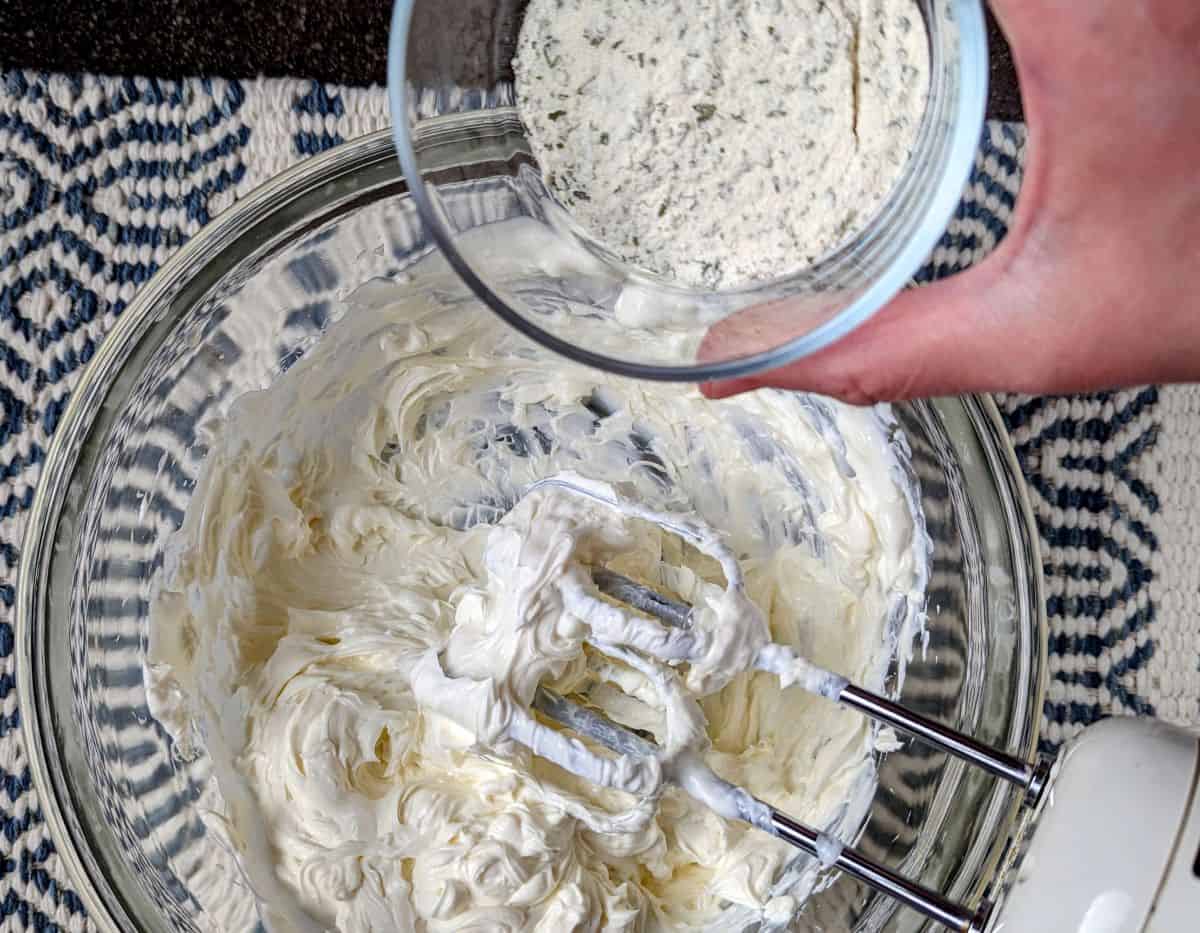
- Step 1: Beat room temperature cream cheese and sour cream on medium speed until fully blended. Add the ranch seasoning and blend on low until smooth.
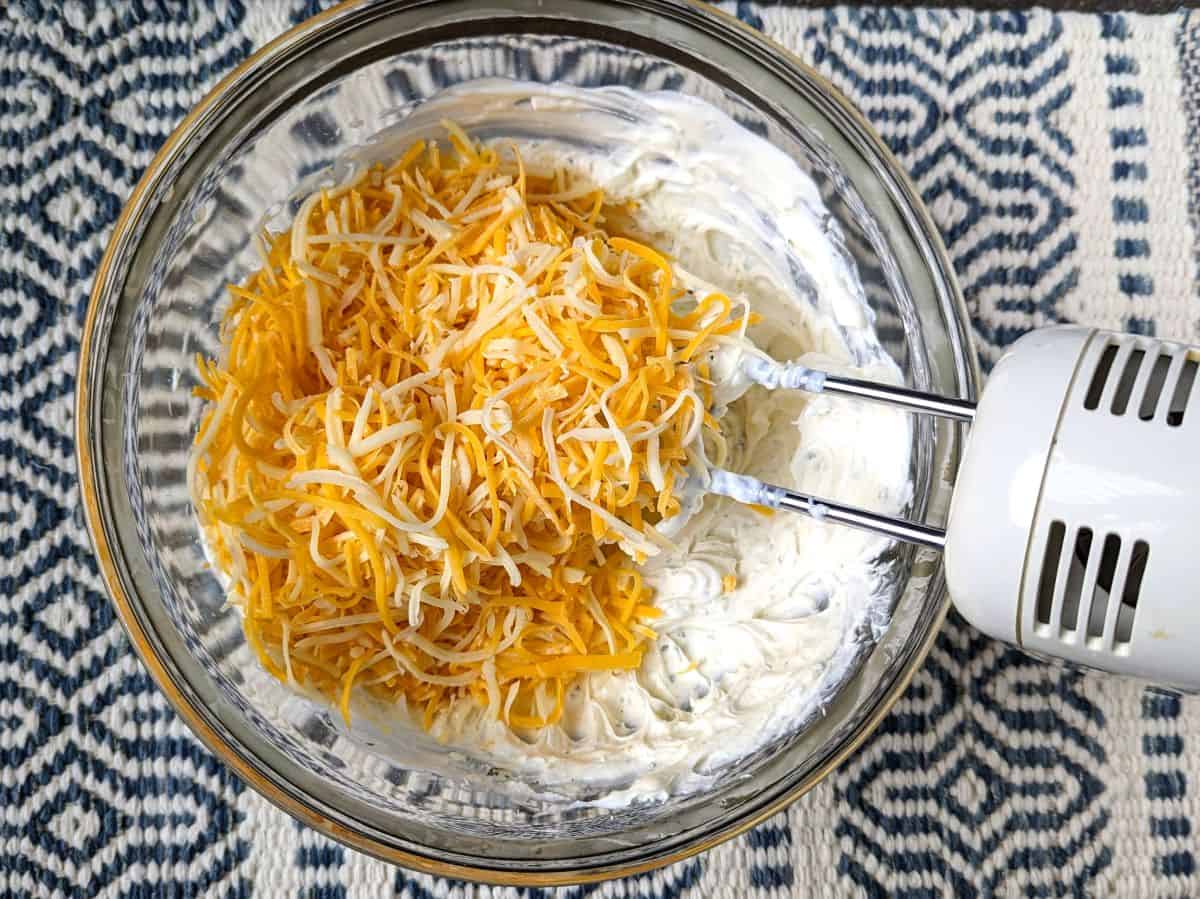
- Step 2: Add the shredded cheese and blend.

- Step 3: If you're making one large cheese ball, you'll need one large piece of plastic wrap. If you're making one of the holiday versions (see below), you'll need two pieces of plastic wrap.
- Step 4: Chill the cheese ball(s); then arrange on tray and decorate, if desired.
Hint: Allow the cream cheese to soften to room temperature for easier mixing, or soften in the microwave for 30 seconds.
🔪Encasing video
📖Variations
All use the same base ingredients and same amounts. When needed, we simply reserve a little of the mixture to make an additional, smaller cheese ball.

- For Easter: The Zesty Bunny With Triscuit/cream cheese/bacon bits ears, carrot/cream cheese/peppercorn eyes, bacon bits nose, sliced carrot whiskers (and, yes, we also think this could work as a cat!)
Check out Dyed Deviled Eggs for another fun and creative Easter Appetizer!

- For Thanksgiving: The Zesty Turkey With pretzel stick feathers, Snyder's Pretzel Rounds on the belly, candy eyeballs, and a sliced pepperoni wedge for the beak. View a separate recipe post for the turkey version HERE.

- For winter holidays: Zesty the Snowman With celery stalk spine, pepperoni hat (held by toothpick), candy eyes, half of a baby carrot for a nose and half of a pepperoni slice for a mouth

- For game day: Football Cheese Ball With American cheese stitches and crushed pretzels or nuts for the leather. View a separate post for the football version HERE.
🍽Equipment
- hand mixer or food processor
- large mixing bowl
- mixing spoon
- measuring cups
- measuring spoons
- plastic wrap
🍶Storage
Keep Zesty Ranch Cheese Ball refrigerated and store in an airtight container until ready to serve. Leftovers will keep for up to 5 days. Try to remove any added decor before you refrigerate leftovers--otherwise, they will get soggy.
💭Top tip
Allow the cheese ball to solidify overnight in the fridge for best results. When ready to serve, choose a serving tray with additional room so you can add crackers, other cheeses, pepperoni and veggies of varying colors. You can't go wrong with a variety of these options. Anything that goes well with ranch and cream cheese will go well with this tasty cheese ball.
🗨️FAQ
The key is chilling. After mixing your ranch and cream cheese base, wrap it tightly in plastic wrap and refrigerate for at least 2 hours (or overnight). This allows the fats to solidify so it holds its shape on the serving tray.
You can prepare the cheese mixture up to 2-3 days in advance. However, wait to roll it in your exterior toppings (like nuts or bacon) until just before serving to ensure they stay crunchy and don't get soggy in the fridge.
For food safety, a cheese ball should not sit out for more than 2 hours. If you're hosting a long party, consider making two smaller cheese balls and keeping one in the fridge until the first is finished.
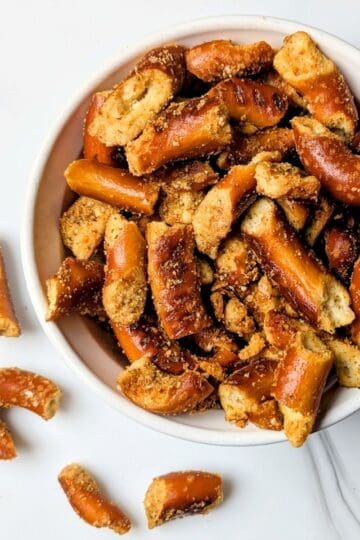
Sturdy dippers are best. Try buttery crackers (like Ritz), pita chips, pretzel twists, or raw vegetables like carrot sticks, celery, and bell pepper strips.
Unfortunately, no. The liquid dressing will make the cheese ball too soft to hold its shape!
🥄Related
Looking for other recipes like this? Try these:

🍴Pairing
These are my favorite snacks to serve with Zesty Ranch Cheese Ball:


📋Recipe With Step-By-Step Instructions

Zesty Ranch Cheese Ball
As an Amazon Associate, I earn from qualifying purchases. I only recommend products I truly love and use in my own kitchen!
Ingredients
- 12 oz full fat cream cheese 1 & ½ bricks, Philadelphia brand
- ½ cup reduced fat sour cream Daisy's or Breakstone's
- 2-3 tablespoon dry ranch seasoning mix choose your level of zestiness
- 1 & ½ cup reduced fat Colby Jack shredded cheese blend Kraft's 2% recommended
Instructions
How to Make Zesty Ranch Cheese Ball:
- Allow cream cheese to soften at room temperature prior to starting for easier mixing (or microwave for 30 seconds in bowl).
- Place the softened cream cheese and sour cream in large mixing bowl. Set the hand mixer to medium speed and blend until contents are fully incorporated, usually 1-2 minutes.
- Add desired amount (2-3T.) of ranch mix to bowl and blend on low speed until smooth.
- Add the shredded cheese to the bowl. Blend on medium speed until well blended, usually 1-2 minutes.
Cheese Ball Encasing Instructions:
- Place plastic wrap on your counter and then put the cheese mixture in the center.
- Fold the plastic wrap in toward the center, with the goal of getting the corners to meet in the middle.
- Twist the plastic wrap so that the cheese ball is entriely encased in the center.
- Using your hands, form a ball out of the mixture. Continue to mold until you have a decent looking sphere.
- Refrigerate for a minimum of 4 hours, though 24 is recommended for optimal solidification.
- Decorate and plate as desired.
Notes
Nutrition
Please note that nutritional information is provided by a third party service and is intended for guidance purposes only. KitchenReadyBetty.com makes no claims to its accuracy.
Barbara K. says
It sounds delicious. It's easy to make and with ingredients we all love.
Kitchen Ready Betty says
It is so easy and fun to make! I hope you enjoy it!
Alex says
Was perfect for Thanksgiving. The cheese ball went so well with crackers.
Kitchen Ready Betty says
Hi Alex! I'm so glad the Zesty Ranch Cheese Ball was a hit for your Thanksgiving appetizer spread! It really is the perfect party cheese ball for pairing with crackers or veggies. I love that it's such an easy make-ahead holiday recipe. Thanks so much for the 5-star review!