These delicious Cheesy Pepperoni Pizza Sliders are the perfect choice when you're looking for a change of pace on family pizza night. Smothered on top with garlic butter and fresh parmesan, each bite is a pizza lover's dream. Slider buns are filled with gooey melted cheese, delicious sauce and loads of turkey pepperoni.

We just can't get enough of sliders. Have you tried my Ham and Swiss Cheese Sliders? They're legendary around here. We love them so much that they are now a main entrée at Easter.
So yes, you might say we're a little slider obsessed.
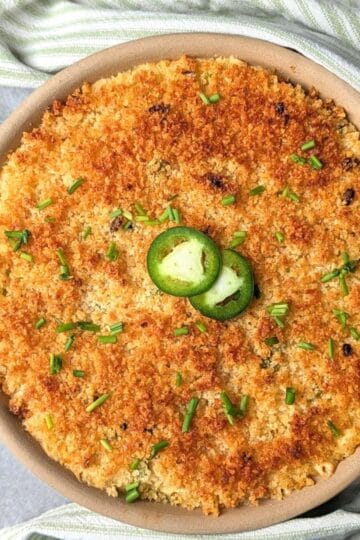
Layered with zesty pizza sauce, mounds of turkey pepperoni and loads of shredded Italian cheese, these tasty little pepperoni sliders definitely live up to their name, just like Pepperoni Pizza Dip!

And the best part? The savory, garlic butter parmesan glaze that gets schmeared on top. It's so tasty, it should be bottled up and sold in stores. It's seriously that good.
These sliders can get a little messy. But a little mess never hurt anyone. Especially when it's from indulging in an almost too delicious to describe, get-it-before-it's-gone, pizza slider!
Jump to:
🥘Ingredients

- Hawaiian sweet rolls- King's Hawaiian recommended for their sweetness
- pizza sauce- I like a chunky sauce because it's usually a little thicker--you can also use marinara sauce
- turkey pepperoni- I like turkey for this because it has less fat and calories
- shredded Italian cheese blend or mozzarella- this is where I can't skimp on fat and calories. Kraft's shredded Italian 5 cheese is awesome for this
- butter, melted- I use salted butter
- garlic powder & Italian seasoning
- freshly shredded Parmesan cheese- choose refrigerated shredded in a bag if you don't have time to do it yourself
See recipe card for quantities.
🔪Instructions

- Step 1: Spread sauce over roll bottoms in pan.

- Step 2: Layer on pepperoni, followed by the cheese.

- Step 3: Cover with roll tops; then make garlic butter and spread on top.

- Step 4: Add toothpicks to keep sliders in tact; bake.
Hint: Assemble the sliders no more than an hour or so before you're ready to bake them. The sauce can get--well, pretty saucy--and the bottom of the rolls can get a little soggy. And although these are absolutely amazing once made, they don't keep for long in the fridge (1-3 days max).
📖Variations
- Spicy - use spicy pizza sauce and add crushed red pepper flakes to the butter glaze
- Favorite toppings - add an extra layer with your favorite toppings; canned sliced mushrooms, sliced onions, and banana peppers are fun choices
See Philly Cheesesteak Sliders and Easy Chicken BBQ Sliders for more crowd-favorite sliders recipes!
🍽Equipment
- 13 x 9 in. pan, greased or lined with greased foil
- cutting board
- long serrated bread knife
- small pot with lid
- stirring spoon
- pastry brush (optional, but handy)
- foil
- toothpicks (optional, but handy)
🍶Storage
Store Cheesy pepperoni Pizza Sliders in an airtight container and refrigerate. Enjoy within 3 days (the longer these sit, the soggier they get).
Reheating instructions: Arrange in a single layer on a prepared pan, cover loosely with foil and bake at 300 degrees for 10 minutes. Uncover and bake an additional 2-3 minutes or until sliders are heated through (the melted cheese will be a good guide for this).
Freezing isn't recommended.
💭Top tip
I like to insert a toothpick into the top of each slider. While not absolutely necessary, I do this for two reasons:
Although temporary, they help to press down the ingredients in each individual slider since they're so packed!
The toothpicks also help me to create a foil tent over the sliders. We bake these covered, but we don't want any of the foil sticking to the tops of the sliders. The toothpicks serve as a guide when tenting the foil over the pan. Once you have a good tent, remove the toothpicks and set your foil tent loosely over your baking dish.
❓FAQ
The secret is in the slice! When cutting your Hawaiian sweet rolls, try slicing slightly above the suggested perforation to create a thicker bottom bun. Using a chunky pizza sauce instead of a watery one also makes a huge difference. Finally, bake them within an hour of assembling so the sauce doesn't have too much time to soak into the bread.
Hawaiian sweet rolls are the absolute best choice for this recipe. That signature sweetness perfectly balances the zesty sauce, savory turkey pepperoni, and the gooey, all-white Italian cheese blend. Plus, pulling them apart after they come out of the oven is half the fun!
It's best to assemble these no more than an hour before baking to keep the bottoms perfectly soft but intact. However, you can definitely prep your ingredients in advance! Have your turkey pepperoni, shredded cheese, and garlic-parmesan butter glaze ready to go so you can build the sliders in minutes when it's time to eat.
🍕More Pizza Recipes
Looking for other pizza recipes like this? Try these:

🍴Pairing
These are my favorite dishes to serve on Game Day with Cheesy Pepperoni Pizza Sliders. You can also head over to our dedicated Appetizers page for even more tasty ideas!

📋Recipe With Step-By-Step Instructions

The Best Cheesy Pepperoni Pizza Sliders
Equipment
- 13 x 9 in. pan (greased or lined with greased foil)
- cutting board
- long serrated bread knife
- Small pot with lid
- stirring spoon
As an Amazon Associate, I earn from qualifying purchases. I only recommend products I truly love and use in my own kitchen!
Ingredients
- 1 (12 count) Hawaiian sweet rolls
- 1 cup pizza sauce
- 5 ounces turkey pepperoni
- 8 ounces shredded Italian cheese blend or mozzarella
- ¼ cup (½ stick) butter melted
- ½ teaspoon garlic powder
- 1 teaspoon Italian seasoning
- ½ cup freshly shredded Parmesan cheese
Instructions
- Preheat oven to 350 degrees.
- Unpackage rolls. Turn the entire set of rolls on its side. Use a bread knife to slice through all of them at once, but keep all the tops and bottoms together.
- Lightly grease a 9x13 pan or line the pan with foil and lightly grease. Then lay the bread bottoms (still connected) in the dish, cut side facing up.
- Spread the pizza sauce over the rolls in the pan.
- Then top with the turkey pepperoni.
- Sprinkle on the shredded Italian or mozzarella cheese.
- Cover with roll tops (still connected) and set aside.
- In a small saucepan, melt the butter. Then add the garlic powder and Italian seasoning. Stir to combine and remove from heat.
- Add the freshly shredded parmesan and mix well. The mixture will be very thick--almost like a paste.
- Spoon the butter glaze evenly over the tops of the rolls. Then use a pastry brush to evenly distribute.
- Bake for 20-25 minutes covered and then 5 minutes uncovered. You'll know they're done when the inside cheese is starting to ooze!
- Let stand for 5 minutes; then separate and enjoy!
Notes
Nutrition
Please note that nutritional information is provided by a third party service and is intended for guidance purposes only. KitchenReadyBetty.com makes no claims to its accuracy.

Tammy D. says
These were such a hit at our party...we really loved all the cheese. It really was like eating a pizza--sandwich style!
Kitchen Ready Betty says
So glad you liked them! They are always popular at parties because of their awesome pepperoni pizza flavor!
Ellen M. says
These pizza sliders were so easy to make (and eat). Thanks for the tasty recipe.
Kitchen Ready Betty says
Yes, this is an easy recipe, and they don't take long to bake either!
Barbara says
This sounds like another slider to enjoy
Kitchen Ready Betty says
Hi Barbara! I’m so glad these caught your eye. If you love easy pull-apart appetizers, these Cheesy Pepperoni Pizza Sliders are always a hit. They’re basically a handheld version of everyone’s favorite pizza! Since you mentioned enjoying sliders, you might also want to check out my Turkey and Cheese Pinwheels for another quick and tasty snack option. Thanks for the support!