A party and lunch favorite, these bite-sized roll-up Turkey and Cheese Pinwheels are easy to make and fun to eat. With turkey, cheddar, bacon and ranch, each delicious bite is bursting with crowd pleasing flavors in between layers of tasty, soft tortillas.

This super easy turkey pinwheels recipe is a favorite go-to when I need a quick meal or a hassle-free party appetizer, just like Pepperoni Pizza Crescent Rolls. I love the fact that it's prepared ahead of time and keeps well in the fridge for several hours--even overnight!
When I'm ready to serve, all I need to do is slice the roll ups into 1 inch pieces. With no oven used and hardly any prep work involved, these tasty turkey pinwheels really are a breeze to put together.
Jump to:
👪Why you'll love it
| Super easy, make ahead recipe- This is a great game day or party appetizer--especially since it's made ahead of time and keeps well in the fridge. If you're taking the pinwheels to a party or tailgate, bring them along rolled up and simply slice them when you arrive (they transport easier that way). Highly customizable recipe- There are so many ingredients that can be added to these tasty pinwheels. From crunchy, colorful veggies, including spinach, diced peppers, olives, pimentos and cucumbers, to additional smoked meats and cheeses (ham and Colby Jack are two of my favorites), feel free to make this recipe your own. Great for picky eaters- Turkey cream cheese pinwheels are protein packed, and are a great way to sneak in a ton of nutrients. They're also super fun to eat and definitely kid-approved! These bite-sized sandwiches are great for lunchboxes and also busy weeknights. Serve with some fresh veggies or a fruit salad and you have a complete meal. |
🥘Ingredients
For a full list of ingredients and measurements, see the printable recipe card below
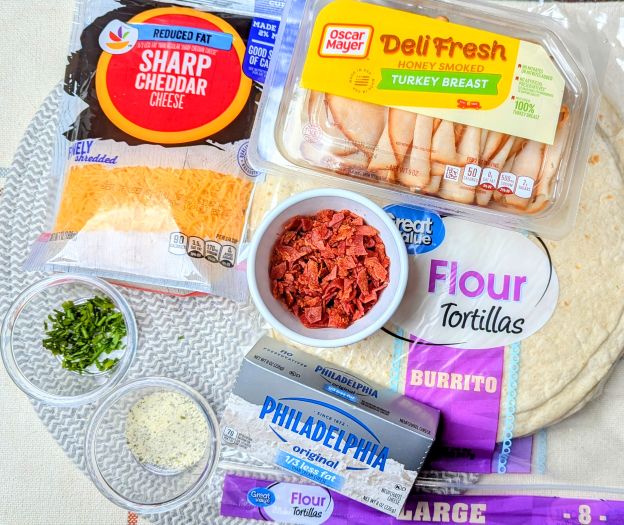
- Burrito sized flour tortillas--feel free to use spinach, sun-dried tomato, or wheat here instead--just make sure to use an extra large size for a good roll up and pinwheel spiral effect; also use fresh tortillas (stale ones are hard to roll and keep together)
- Cream cheese, softened--I use reduced fat Philadelphia brand; this is the "glue" that keeps the pinwheels together
- Ranch mix & fresh chives--these herbs and seasonings are added to the cream cheese spread to make it super tasty and flavorful
- Finely shredded cheddar cheese--I use reduced fat; I like finely shredded because it sticks to the cream cheese better
- Cooked, chopped turkey bacon--feel free to use regular bacon or, to save time, use pre-packaged real bacon crumbles (just don't use the crystallized stuff)
- Thinly sliced deli turkey--for a shortcut, Oscar Mayer is my preferred choice; I like the smoked or honey smoked for added flavor. If you're using lunchmeat from the deli counter, I recommend Boar's Head.
🔪Instructions
Below is a list of instructions. For a more detailed list, see the printable recipe card below.
- Cook bacon in a skillet until brown and crisp; crumble into small, bite-sized pieces.
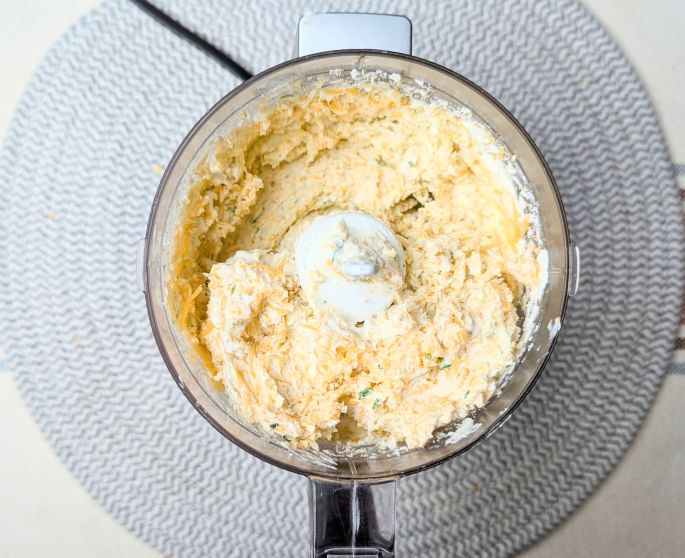
- Add the softened cream cheese and shredded cheddar cheese to a food processor. Blend until smooth.
- Add the chopped chives and ranch seasoning mix to the food processor; blend with the cheese mixture.
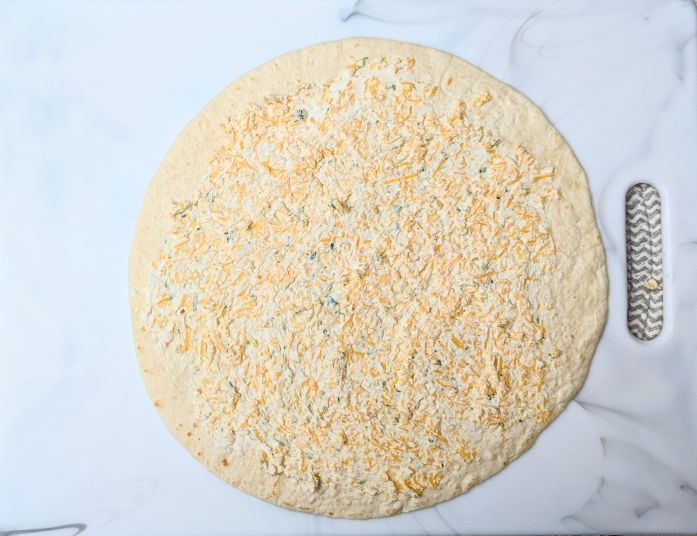
- On a clean workspace, lay out one burrito. Spread roughly ¼ of the cheese mixture onto the burrito. Be sure to cover the ENTIRE surface of the burrito.
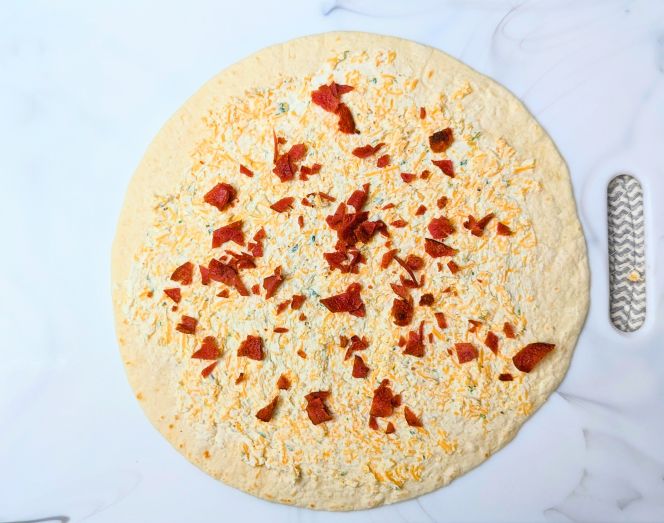
- Sprinkle ¼ of the crumbled bacon on top of the cheese mixture.
- Arrange turkey lunchmeat over the bacon, leaving space at the top of the tortilla for rolling.
- Using both hands, start at the bottom and tightly roll up the burrito so that the meat and cheeses get tucked inside.
- Wrap the turkey roll up tightly with a few layers of plastic wrap.
- Repeat these steps to make three more roll ups. Then refrigerate for a minimum of one hour.
- When ready to serve, remove the plastic wrap. Place the roll ups seam side down on a cutting board; gently slice into 1 inch pieces to make pinwheels.

Hint: Gently slice the pinwheels with a sharp knife. Otherwise, they may get squished when you're trying to cut them.
🥣Substitutions
Cream cheese: You can use a flavored cream cheese, such as veggie, or onion, to change the flavor profile. If you choose this option, omit the ranch.
Scallions: If you can't find chives, finely chop green onions instead.
📖Variations
Spicy: Use cracked pepper turkey breast. Add finely diced jalapeños to the cream cheese mixture. Use finely shredded pepper jack cheese instead of cheddar.
Deluxe: Use half ham, half turkey. Add finely shredded Colby Jack or Monterey Jack cheese in addition to the cheddar.
Veggies: Add fresh spinach leaves and diced pimentos for added nutrition, flavor and color.
🍽Equipment
- frying pan and kitchen prongs (if cooking your own bacon)
- small cutting board and chef's knife
- food processor or large mixing bowl with sturdy spoon
- measuring spoons
- mixing spoons
- spreading spatula
- plastic wrap
🍶Storage
Store in an airtight container and keep refrigerated. Enjoy assembled pinwheels within 2-3 days. If you need to make some of this recipe further ahead of time, mix the cheese and herb portion and keep it refrigerated in a separate container. It can keep this way for up to one week. Then assemble the roll ups and have them set for at least one hour in the fridge before slicing.
Because of the cream cheese and flour tortillas, freezing isn't recommended. The turkey pinwheels will be too soggy when you defrost them.
💭Top tip
This is a great make ahead recipe, but I wouldn't have the turkey roll ups sit more than 12 hours in the fridge before slicing and serving. Eventually, they will get soggy, so plan accordingly!
🗨️FAQ
The cream cheese acts as a glue that holds everything together. Use enough on each tortilla and spread to the edges so that everything sticks. Use tortillas that are fresh and aren't dried out. Finally, roll the pinwheels tightly and secure well with plastic wrap, so they stick together well while in the fridge.
That usually happens when pinwheels get overstuffed, especially with wet ingredients, like tomatoes, or they sit for too long. If you use wet ingredients, enjoy the pinwheels within a few hours of making them.
For this recipe, usually 2-3 per person as an appetizer and 6-8 for a meal.
🥄Related
Looking for other recipes like this? Try these:


🍴Pairing
These are my favorite dishes to serve with Turkey and Cheese Pinwheels:


📋Recipe With Step-By-Step Instructions

Turkey and Cheese Pinwheels
As an Amazon Associate, I earn from qualifying purchases. I only recommend products I truly love and use in my own kitchen!
Ingredients
- 4 burrito-sized flour tortillas (extra large sized tortillas) can use spinach, wheat or other varieties
- 8 oz. reduced fat cream cheese, softened Philadelphia brand recommended
- 1 tablespoon dry ranch mix half of a Hidden Valley Ranch packet
- 2 tablespoons fresh chives finely chopped
- 1 cup sharp cheddar cheese, finely shredded I use reduced fat
- 8 slices turkey bacon, cooked and chopped may substitute regular bacon or pre-packaged real bacon crumbles
- 8-9 oz. package Oscar Mayer Smoked or Honey Smoked Turkey Breast lunchmeat you may use any lunchmeat, including Boar's Head--just make sure it's thinly sliced
Instructions
- Cook 8 bacon strips in a skillet, flipping occasionally, until brown and crisp. Remove from heat, pat with paper towels to absorb excess grease, and crumble into small, bite-sized pieces.
- Add the softened cream cheese and shredded cheddar cheese to a food processor. Blend until smooth.
- Chop the fresh chives into tiny pieces; then add the chives and ranch seasoning mix to the food processor. Pulse and blend until fully incorporated with the cheese mixture.
- On a clean workspace, lay out one burrito. Spread roughly ¼ of the cheese mixture onto the burrito. Be sure to cover the ENTIRE surface of the burrito since this is the "glue" that holds the turkey roll up together.
- Sprinkle 2 crumbled strips (or roughly ¼ of the bacon) on top of the cheese mixture.
- Arrange 6-8 thin slices of turkey lunchmeat over the bacon. It's okay if the slices overlap each other. Cover roughly ⅔ of the burrito with the turkey slices, but allow approximately ⅓ to be uncovered at the top (that's because as you roll it up, the turkey will naturally start shifting to the top edge).
- Using both hands, start at the bottom and tightly roll up the burrito so that the meat and cheeses get tucked inside.
- Wrap the turkey roll up tightly with a few layers of plastic wrap.
- Repeat these steps to make three more roll ups. Then refrigerate all four of them for a minimum of one hour.
- When ready to serve, remove the plastic wrap. Place the roll ups seam side down on a cutting board; gently slice into 1 inch pieces. You should yield 8 decent looking pinwheels from each roll up (you may discard ends if you wish).
- Refrigerate leftovers, store in an airtight container and enjoy within 2-3 days. Because of the cream cheese and flour tortillas, freezing isn't recommended. The turkey pinwheels will be too soggy when you defrost them.
Notes
- Soften the cream cheese on your counter for easier mixing. If you don't have a food processor, you will mix everything with the cream cheese in a large bowl with a sturdy spoon.
- Gently slice the pinwheels with a sharp knife. Otherwise, they may get squished!
- This is a great make ahead recipe, but I wouldn't have the turkey roll ups sit more than 12 hours in the fridge before slicing and serving. Eventually, they will get soggy, so plan accordingly!


Barbara K. says
This recipe looks good, easy to make and sounds delicious and fun to try and enjoy.
Kitchen Ready Betty says
Yes, that's right! It's also very customizable. We love this one for a quick meal.
Susan R. says
Thanks for the suggestion of using a food processor. It's so much easier to make the filling that way.
Kitchen Ready Betty says
So much easier!
Liz M. says
This recipe looks good enough to eat, and so easy to make.
Kitchen Ready Betty says
Pinwheels are very easy to make and are very tasty indeed.
Alex says
These were so easy to make! Would recommend.
Kitchen Ready Betty says
Thanks for the recommendation, Alex! I love how quickly these Turkey and Cheese Pinwheels come together for a quick lunch or party appetizer. So glad you found them easy to make.